Estimated Difficulty: 💜💜💜🤍🤍
Another song themed blog, this blog will mostly cover BurpSuite interception basics (including how to setup BurpSuite). We will be demonstrating BurpSuite using Kali Linux, using the Community Version (1.7.35).

As always, constructive criticisms and feedback are always welcome!
Back to Basics
Before we dive into the realm of web hacking and the wonders of Burp Suite, it’s important to understand the basics of how the Internet and the World Wide Web works. The Internet can be defined as “A worldwide system of computer networks connected with each other”, the World Wide Web is a service on the Internet that allows us to browse it.
A few key points to understand about the World Wide Web:
- The “WWW” is a collection of different web pages
- Content is dictated through HTML (HyperText Markup Language)
- Clients access servers through HTTP (HyperText Transfer Protocol)
- Pages are linked together using URLs (Uniform Resource Locators) e.g. http://www.mywebsite.com
There is obviously much more to this, but these few points should help you grasp the basic concept of the “web” for now.
Accessing Web Pages
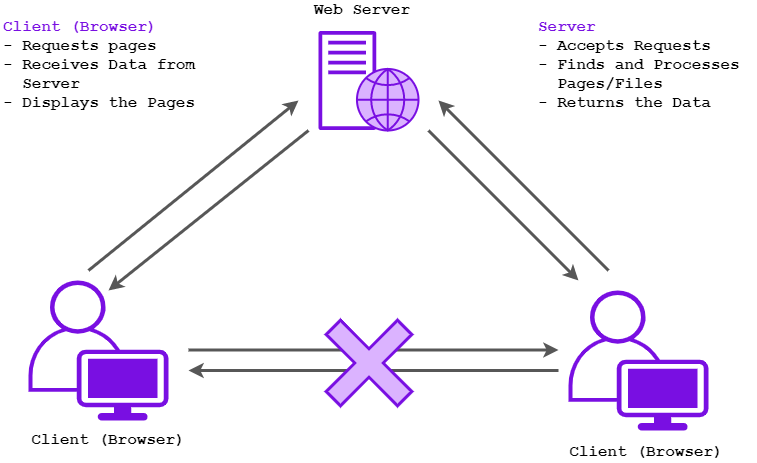
So how does the client/server relationship work when a browser tries to access a web page? Hopefully the following diagram can help visualise it…

The client will firstly request the page from the web server, receiving the data when the server successfully accepts the requests and finds the correct page to return to the client. Once this process has been completed, the browser will display the page. Typically, browsers will not directly communicate with each other over the Internet.
Now knowing the basics of how web works, hopefully you will be able to understand how BurpSuite can be used for web hacking and interception attacks…
What is BurpSuite?
BurpSuite is a collection of web application testing tools that range from intercepting web traffic, to automating brute force attacks against forms. This blog will primarily focus on understanding how Burp works as an interception tool. Because of this, we will only be focusing on the “Proxy (Intercept)” and “Repeater” tabs and their relevant functions.
Starting BurpSuite, you will be asked if you would like to start a project. Simply selecting “Temporary Project” will do, select “Start Burp” and you should be brought to the main interface GUI.
How to Setup the Burp HTTP Proxy (Kali Linux)
One of the most common features (and the main one for this blog) is using the HTTP proxy to allow you to intercept, record, replay and modify requests made by clients to the server. To allow this feature to work, you will need to set up a HTTP proxy within your browser to feed into BurpSuite.
The following instructions will help you set up a HTTP proxy on Kali Linux, utilising the inbuilt community version of BurpSuite and the Firefox browser.
Please note that the UI in the following instructions may vary depending on the version of Kali Linux, however the fundamental instructions should still be the same.
1. Open Firefox and open Preferences by clicking the three horizontal lines on the far right of the window, and then the cog labelled “Preferences”

2. Go to the “Advanced” > “Network” and open the Connection Settings

3. Choose “Manual Proxy Configuration” and change the HTTP Proxy to “127.0.0.1” and Port to “8080” (Tick the “Use this proxy server for all protocols” box)

By default Burp creates a listener on port 8080, which is why we are setting our HTTP proxy as “127.0.0.1:8080”
Installing the Burp’s CA Certificate
It is also wise to install Burp’s CA Certificate into your browser, to avoid any trust issues if you are intercepting HTTPS traffic. By installing the certificate, this allows your browser to trust any communications done through the Burp proxy.
1. With your HTTP Proxy on, start a new Burp project and open “http://burp” in Firefox

2. Click on “CA Certificate” and download “cacert.der”

3. Go to “Preferences” and then the “Advanced” Tab (as we did previously) and select “Certificates”

4. Select “View Certificates” (the manager should automatically open in the “Authorities” tab)

5. Select “Import” > Select “cacert.der” > Ensure that “Trust this CA to identify websites.” is ticked > Click “OK”

6. Click “OK” to exit the Certificate Manager

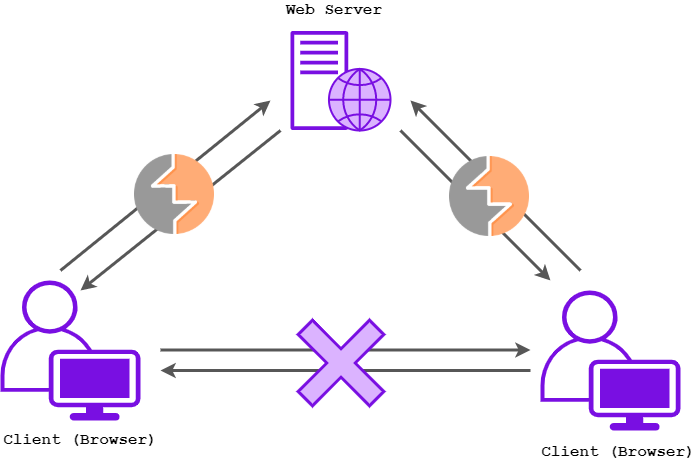
Now you have setup your HTTP Proxy and CA Certificate, we can now intercept connections between the client and the server

This is particularly useful for manipulating traffic outgoing to the server, especially values such as cookies and referrers…
Common Web Hacking (Interception) Techniques: Cookie Manipulation & Referrer Spoofing
Cookie Manipulation
Cookies are small files stored on your computer when you visit a website, and are specific to clients and the relevant website. They hold values that can help the server customise the site to the client, for example:
FirstName=John
loggedIn= 0
sessionID = 123456789
Intercepting traffic with BurpSuite, we can start to change the cookie values to change how the server perceives us. A simple attack would be changing a value such as “loggedIn” to “1” to attempt to fool a server to think that we are already logged in (even though we are not, and probably lacking valid credentials…)
Referrer Spoofing
Referrers are identifed as the website we are coming from, to spoof this will fake the URL that the server perceives we are coming from. Attackers can take advantage of this to bypass mechanisms to attempt to reveal sensitive information (e.g. changing the referrer to an internal address) or to “cover their tracks”. We can also change the referrer of a request using BurpSuite interception.
The following section will be utilising the online web security war game Natas by OverTheWire to demonstrate “Proxy (Intercept)” and “Repeater” – there may be some spoilers!
Using the Proxy (Intercept) Tab
When you click the Proxy tab, you should be able to see an “Intercept” sub-tab. This is the main tab that we will be using to intercept traffic and modify values. Once you turn on your HTTP proxy, ensure that the “Intercept is on” button is selected and every request you make and data you receive by the server will be displayed in this tab. If you load a page, the request will simply be “held” so you can analyse it, modify it – or use another BurpSuite function against the traffic capture (e.g. repeater) until you “forward” the traffic onward.

After you intercept the traffic, you can edit the values as you please. Once you have finished modifying the traffic, simply click “Forward” to send on the traffic back to the browser/server.
Selecting Actions
You can also select “Action” to display all the available actions you can complete against the traffic, a shortcut for this is also right clicking on the message itself.

Request Message Display Formats
You can also change the way you view requested intercepted traffic by selecting a tab to reflect how you would like to see the message. Four options are available: Raw, Params, Headers and Hex.
Raw: This displays the traffic in a raw form

Params: This will display the different request parameters identified by Burp via. a table (you can also add, edit and remove parameters)

NB: Parameters identified by Burp are usually cookies or browser-stored information
Headers: This will display the different header names and values identified by Burp via. a table (you can also add, edit and remove headers)

Hex: This will display the interception as a raw form via. a hex editor (you can also edit individual bytes)

You can also click “Drop” to drop the message, this function will not return the traffic back to the server. You may receive this message in the browser:

For official documentation on Intercept, go here
Using the Repeater Tab
You can send intercepted traffic to the repeater tab within “Intercept”. You can either right click on the captured traffic and select “Send to Repeater”

Or a shortcut for this is “Ctrl + R” whilst in the Intercept tab.
Using the repeater tab is handy if you wish to continue analysing and tampering the traffic to trial for different responses (instead of continually intercepting and forwarding traffic, which can be time consuming!). Simply just modify the content in the Request window, and click “Go” to see the response. You can edit the traffic as much as you want, without having to re-intercept the messages per-modification – how handy?!
Response Message Display Formats
Within the repeater function, you can also render responses and view the response in different formats: Raw, Headers, Hex, HTML and Render.
Raw: This displays the response in a raw form

Headers: This will display the different header names and values identified by Burp via. a table (you can also add, edit and remove headers)

Hex: This will display the response as a raw form via. a hex editor (you can also edit individual bytes)

HTML: This will display responses as HTML in it’s prettified form. The main purpose for this tab is to re-format the Raw display to be more readable to the user.

Render: This will attempt to render the responses to display how the response may look like in a browser

For official documentation on Repeater, go here.
Other Handy Stuff
Comment Field: This allows you add comments to capture traffic so you can identify captures easily in the Proxy History

Highlight: This allows you to colour highlight any interesting stuff (which will also appear in Proxy History). To use this, select the information you wish to highlight then select the coloured squares next to the comment field to select the colour you want to use.

HTTP History: Proxy History can be accessed in the “HTTP History” sub-tab under “Proxy”. This will display all the traffic you have proxied in your project.

Target Scope: Another handy tool is the use of target scope configuration within your project. To access this, go to the “Target” tab, and then the “Scope” sub-tab. Using this can help you set your project scope, which can help filter the HTTP History to only show in-scope traffic, and also tune the HTTP History to only log relevant traffic within scope. You can also use this tool to configure the proxy to only intercept requests and traffic within the scope.

To find out more information on setting your target scope, find the official documentation here.
Practice Makes Perfect
Now that we have walked through the basics of intercepting traffic with Burp, here are a few resources you can use to practice your new-found interception skills:
Natas OverTheWire Wargame
A little web-based wargame to test basic server-side web hacking ability (including interception!)
Source: https://overthewire.org/wargames/natas/
PortSwigger Web Security Academy
Created by the founder of BurpSuite, the Web Security Academy provides a series of labs focal to web application security.
Source: https://portswigger.net/web-security

Immersive Labs
Immersive Labs provide a collection of labs and exercises that teach a whole variety of security skills. Although Immersive Labs provide more than just web exercises, they have an excellent collection of web labs (including BurpSuite specific labs: Burp Suite Basics: Introduction and Burp Suite Basics: HTTPS)
NB: Sign up for free if you are in full or part-time study in any of the following countries: US, UK, Australia, Singapore, Canada, Poland, Germany, the Netherlands, Switzerland
Source: https://dca.immersivelabs.online/
Happy Hacking
I hope you enjoyed this blog post about an intro to interception with BurpSuite, until next time folks!

Sophia x
Amazing! That was loads of info on a tool that I haven’t used much! Thanks!
Thanks Dan! Glad you found use from the blog!