Estimated difficulty: 💜🤍🤍🤍 🤍
Welcome to the wonderful world of hardware. This blog post is a walkthrough of how to build a deauthenticator; a pocket-sized tool that you can create to kick a device off of a network (especially good to know for April fools, or if you just want to have some fun with your siblings…). All you will need to carry out your mission is the following:
- An ESP8266 development board
- A data transfer cable to attach the board to your laptop
- Arduino IDE installed on your laptop
- SpaceHuhn’s code
Disclaimer: Please do not de-authenticate any devices off of an unauthorised network. This is illegal. Ensure you only try this on your own home network.
What is a Deauthenticator?
A deauthenticator is any device that can disconnect another device off of a network. It can be a small development board, shown in the below screenshot, running specific software that was flashed onto the device. There are different types of devices available. The software running the device is accessible through a browser or interface and you (the attacker) can then use this to visibly see the networks available and select the one to de-authenticate the connected devices off of it.
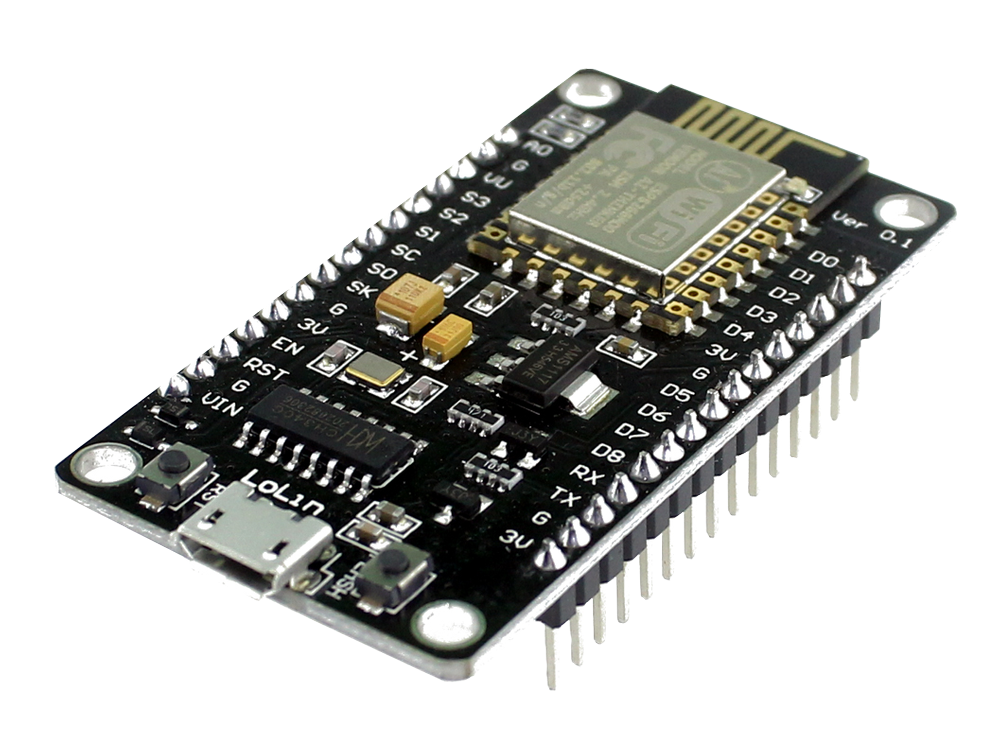
In this tutorial, we will be using a small ESP8266 chip development board, which includes a Wi-Fi module, to allow us to communicate with other networks and de-authenticate the targeted devices. The Wi-Fi module is limited to 2.4GHz networks. This means that if the network does not support 2.4GHz then the devices connected to that network router will not be de-authenticated. More on Wi-Fi networks later!
A deauthenticator runs code that utilises the Wi-Fi module on the board to scan for other networks and interact with them further. The de-authenticator takes advantage of Wi-Fi Management Frames, standardised to allow Wi-Fi networks to manage the connection between a base station (network router or access point) and the client (device such as a mobile or IoT device).
Usually, the de-authentication management frame is sent by a client when they want to disconnect from a router or access point (AP). A router responds with a de-authentication frame. To carry out a de-authentication attack, the deauthenticator crafts a de-authentication frame and takes the MAC address of the selected router and broadcasts the de-authentication frame to all the connected devices on that network. This forces the connected device to disconnect from the Wi-Fi network. The below image summarises this process.

The Technicalities
To understand how a deauthenticator works, we need to understand a little bit more about how Wi-Fi works. The following diagram provides an overview of how a device connects to a router and communicates.

Wireless Frequencies
2.4GHz and 5GHz band radio wave frequencies have been adopted for wireless communications. New routers can have dual-band frequencies. I.e. use both 2.4GHz and 5 GHz, bands. Our development boards using ESP8266 chips only supports 2.4GHz. Because of this, we can only unauthenticated devices communicating on the 2.4GHz frequency ranges. 2.4GHz allows longer ranges but slower data transfer speeds. 5GHz bands allow faster data transfer speeds, but the device must be within a closer range.
Wireless Standards
Wireless standards are the methods defined on how a device can communicate with a router and therefore the internet. If a wireless standard is supported on one device and not another the devices cannot communicate… Unless the standards are compatible. Certain wireless standards have legacy support to older protocols they may be supported on older devices. The following standards have been defined in the below table.
| Standard | Frequency | Max Data Rate** | Modulation | Description |
| 802.11 | 2.4GHz | 1-2Mb/s | DSSS,FHSS | Introduced in 1997. |
| 802.11a | 5GHz | 54Mb/s | DSSS | 1999. Not common.Smaller range than 802.11b. |
| 802.11b | 2.4GHz | 11Mb/s | OFDM | 1999. Made Wi-Fi popular. Slower than a. Longer range than 802.11a. More frequency conflict |
| 802.11g | 2.4GHz | 54Mb/s | DSSS, OFDM | 2003. Compatible with 802.11b. Increase of speeds. Same conflict issues. |
| 802.11n | 2.4GHz, 5GHz | 600Mb/s | OFDM | 2009. Compatible with 802.11a/b/g. MIMO introduced. Multiple Input Multiple Output. More transmit and receiver antennas for communication. |
| 802.11ac | 5GHz | 6.92Gb/s | OFDM | 2014. Denser signal modulation = faster data transfer. 8 MU-MIMO streams to multiple devices at the same time. |
| 802.11ax(2019) | 2.4GHz, 5GHz | 1201Mb/s | 2019. Splits one channel into sub-channels to allow multiple users to communicate. Uses MU-MIMO – access point to address multiple devices at the same time. |
Wireless Security Standards

As the wireless standards that were created were not created with security in mind, additional wireless standards have to be added as a layer on top to ensure that the communication that takes place takes place securely. The following standards have been defined:
| Standard | Date | Description |
| WEPWired Equivalent Provacy | 1997 | 40bit encryption key. Original security standard for WLAN.Key is extremely vulnerable to password cracking. Uses RC4 encryption. |
| WPAWiFi Protected Access | 2003 | TKIP (temporal key integrity protocol) encryption method with RC4.TKIP has vulnerabilities and is outdated. Vulnerable to password cracking. |
| WPA2WiFi Protected Access (v2) | 2004 | Uses AES (advanced encryption standard) encryption algorithm, the industry standard. 256bits most secure – WPA2 only supports 128bit keys..Commonly found on personalised networks. Vulnerable to password cracking if a weak password is used. |
| WPA3 | 2018 | Strong encryption. 256bit keys supported. Disallows legacy protocols. Requires Protected Management Frames (PMF). |
The wireless security standards, although adding encryption, do not add encryption to management frames. The de-authentication management frame is sent in plain text to a device and there is no integrity checking on where or what device it comes from. This makes it possible for our attack to happen, as any rogue device (such as our de-authenticators) can send a de-authentication frame to disconnect a device off of a network.
Let’s build it!
With this knowledge in mind, let’s build our device.
Download Spacehuhn’s Code
- Gather the equipment that you need. A development board and a cable to connect it to your laptop.
- Download the Arduino IDE.
- Download Spacehuhn’s code. We want to follow the installation steps for the Arduino IDE in his wiki.
- Unzip the downloaded file. Open the ESP8266_deauther.ino file. This will open the Arduino IDE. When the Arduino IDE is opened, a numer of tabs should be displayed.

- Configure your SSID (the access points name) in the A_Config.h file from pwned to a name of your choice.
- The default name is “pwned” and the default password is “deauther“. Both can be changed within that file

Configure the Arduino IDE
The Arduino IDE needs to be configured to work with the board. Follow the below steps:
- Add the following boards manager URL at the following location – File > Preferences > Additional Boards Managers URL. The URL you want to enter is below
- Set up the board configuration. Go to the Tools > Boards > Boards Manager.
- In the search bar, enter in the name deauth. Select the Deauther ESP8266 Boards in the results and install them.

- Choose the correct board settings. Go to Tools > Board and select the appropriate board type that matches your development board.
- Select the upload speed (baud rate).
- Note, when trying display the output of the board, ensure that the baud rate matches the baud rate of the serial output.
- Select the flash size.
- Select Erase all flash contents.
- This is so anything previously flashed is erased, and we will be starting on a clean slate for our code.
- Select the deauther config.

- The Port will become available once the board has been plugged in.
- If you do not get the option to select the port after the board has been connected, then this is likely a driver issue.
- Check the device manager to see if there are any alerts for devices tha have been plugged.
- Ensure that you install the right ones for you board.
Verifying and Compiling the Code
Once everything has been set up, we can now check to see that the code is working.
- Select the tick in the top right if the Arduino IDE to check that the code is valid and will compile

- Compile the code by pressing the arrow in the top right of the Arduino IDE.
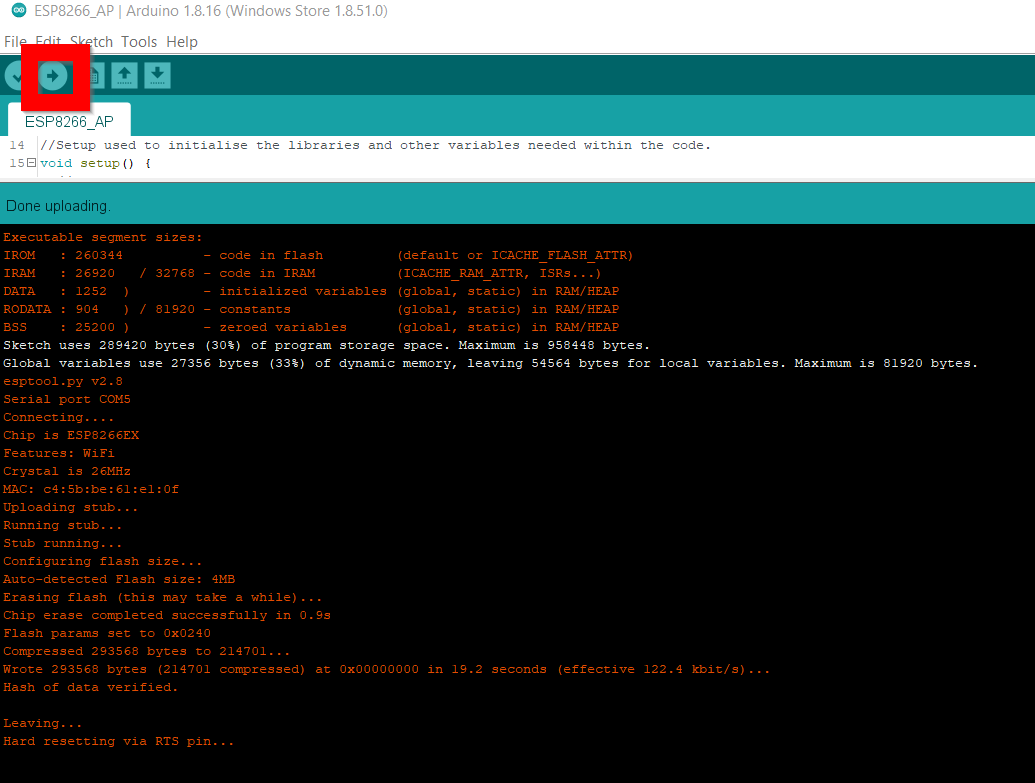
- Once the code has been uploaded to the board, after pressing the arrow, you should be able to see the SSID that you have set for the access point
Connect to the Access Point (AP)
- Select the AP and connect to it. The AP will be named after whatever you changed the SSID to at the start. By default it is pwned.
- Enter the password and hit connect.
- Go to the IP address of the deauther in the browser. By default the address is 192.168.4.1.
- If you have flashed the development board and gone to the address successfully, then you will see a screen similar to the one below, in your browser:
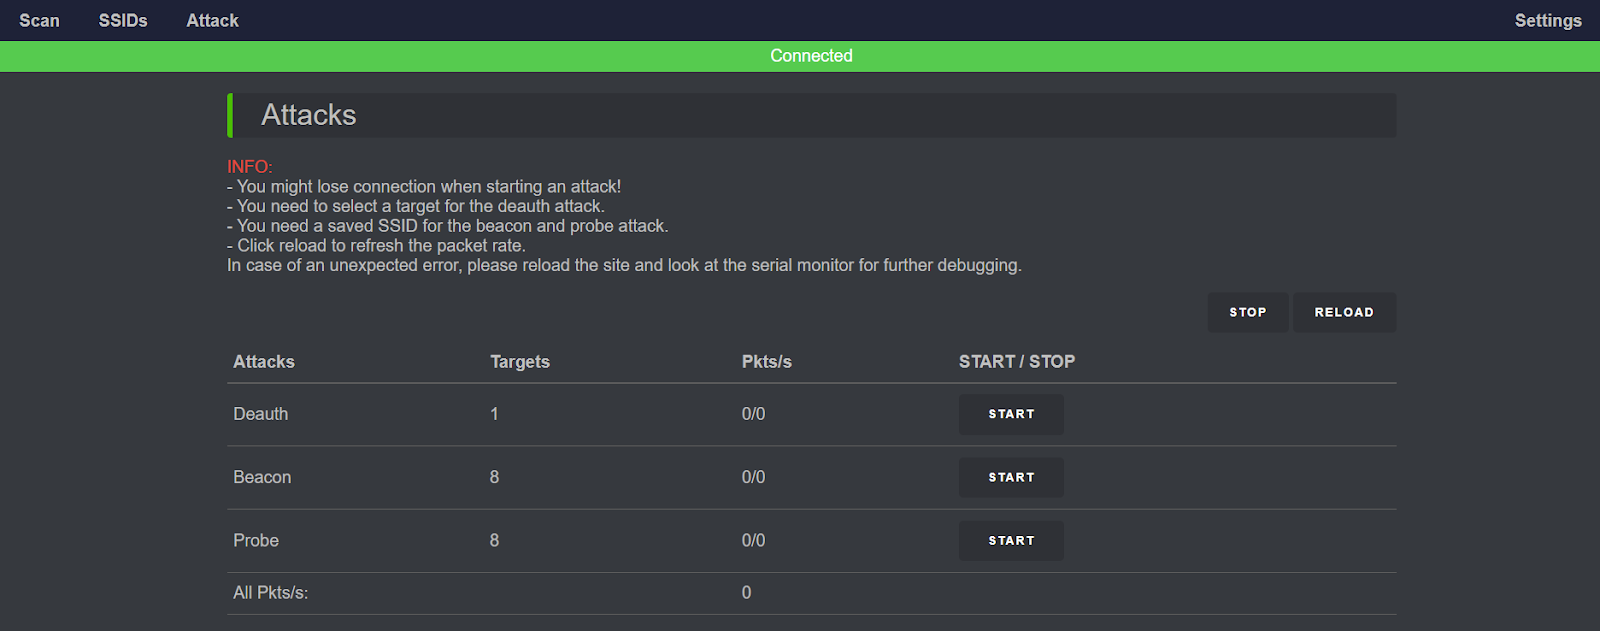
- You can carry out one of the listed attacks.
Deauth Attack – Deauthenticates all devices on the selected and targeted network. All networks can be listed under the scan.
Beacon Attack – Beacons frames are sent with a spam of false SSIDs.
Security to the rescue?
There is a new-ish WiFi standard to protect against the misuse of management frames – 802.11w – The IEEE 802.11w standard was created in 2009 to implement integrity checking in the management frames. The Protected Management Frames (PMF) service was based on 802.11w
- 802.11w is an additional standard on top of 802.11x standards.
- PMF enforces the encryption of disconnect frames, e.g. deauth frames, which means a spoofed frame can be detected.
- 802.11w aims to protect management frames from forgery or spoofing, e.g. prevent users DoS users using the network.
- Makes use of cryptographic encapsulation mechanism for frames.
- Helps to protect against replay attacks.
- AP and Client both need to support PMF for it to work, therefore Wi-Fi is usually vulnerable to these types of attacks.
For more information, feel free to check out my Git Hub repository. More information can be found within the slides.
Thank you all for reading! If you get stuck or have questions, feel free to message me or drop a comment on this post.
Sarah <3